In order for Xero to integrate correctly, a correlating chart of accounts must be set up in both Xobuya and Xero. For ease, Open Xobuya and in a web browser (Chrome, Safari, etc) log in to your Xero instance. Resize the windows on the screen so you can view them side by side.
There are many methods to creating a chart of accounts, and these should be explored and a standard decided upon with Finance management before setting this up in Xobuya.
N.B. this is an Administration function only.
- In Xobuya, click the gear icon in the lower right of the screen, then click the Xero button.
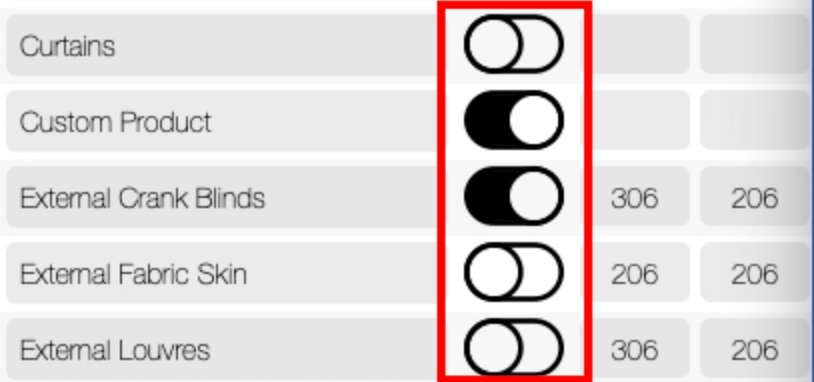
The items we are referring to are marked within the red boxes below:
- In Xero, go to the Accounting Tab and select Chart of Accounts:

- To Configure the Bank Code (Chart of Accounts code for receiving money), ensure the number in Xobuya matches the account code in Xero for your business bank account.

- Creating a Code in Xero. If you do not have a code setup in Xero you can create a code and then type the number in to match in Xobuya. To create a code in Xero:
- Click on the Add Account button

- Enter the Account Details in the subsequent screen:
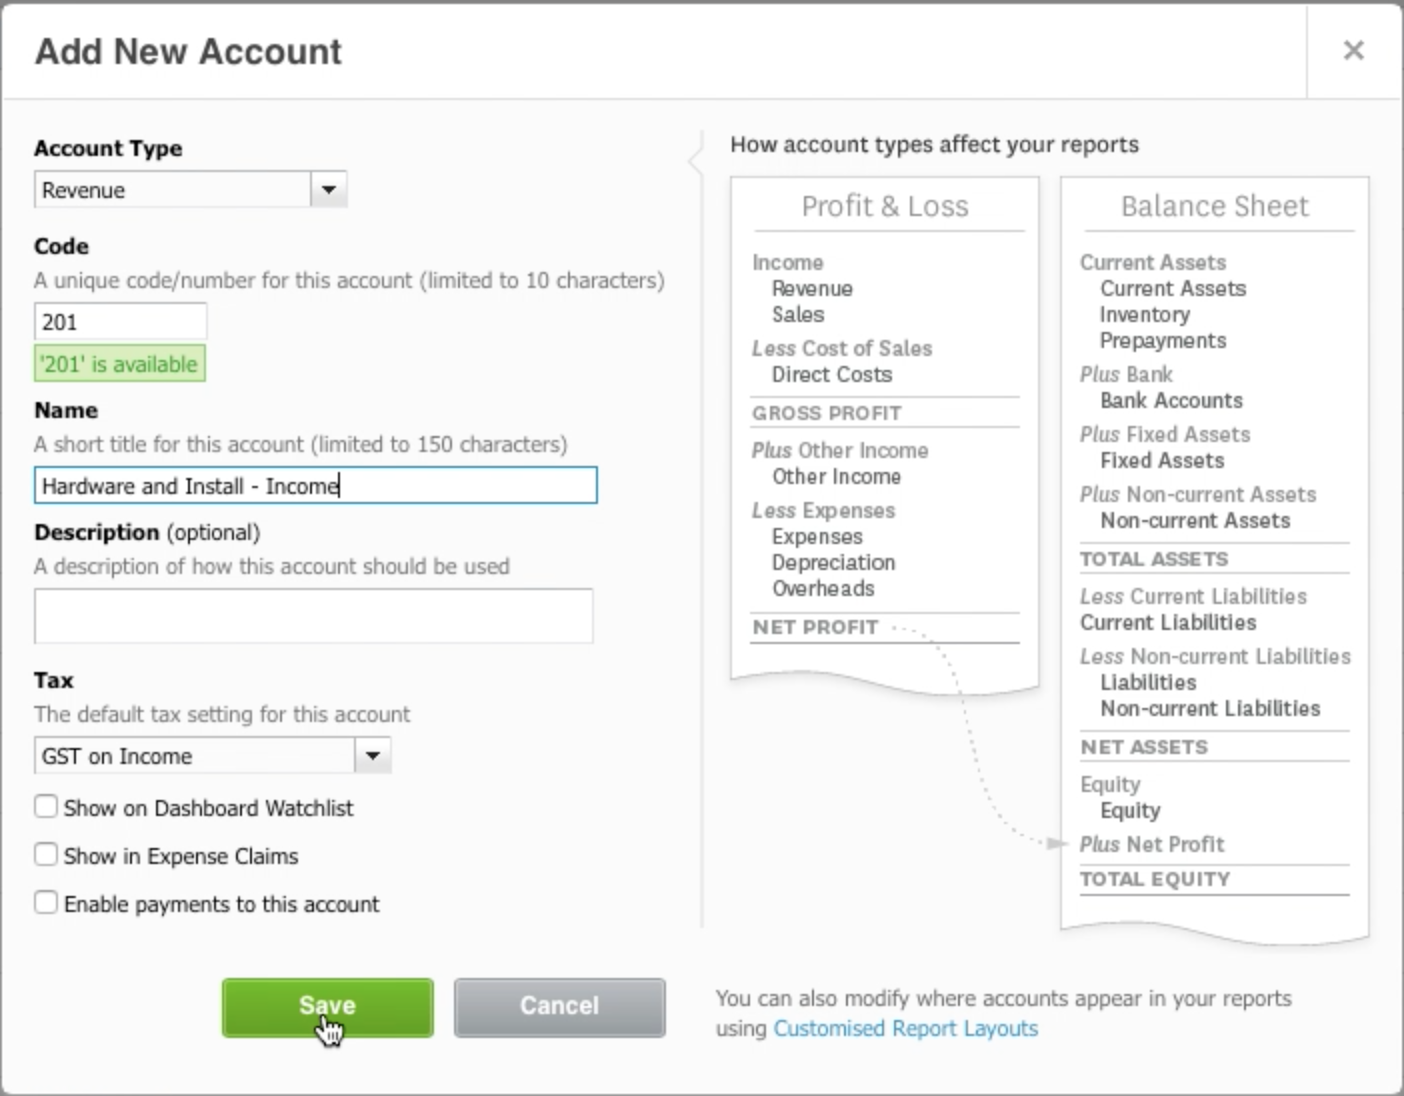
- Enter the Account type (e.g. Revenue, Sales, Expense, etc)
- Enter a unique 3 digit account Code
- Enter a unique Name (for example if you have both income and expense accounts for Hardware and Install, mark one as 'Income' and the other as 'Expense' – Xero does not allow for duplicate account names).
- Tax – Select whether GST applies on the account
- Click Save
- Enter this account code in Xobuya in the appropriate field.
- Click on the Add Account button
The Chart of Accounts in Xero must be replicated in Xobuya in order for this to work. Fortunately, you only need to create one account description in Xobuya which can list the income and expense codes from the two Xero income and expense accounts.
N.B. each item in the Chart of Accounts section will usually have an income and expense account. These must be different account numbers which align with the appropriate income and expense accounts in Xero.
Where required, continue building your chart of accounts in Xero and adding accounts in Xobuya (by pressing the '+' icon at top right) the appropriate codes in Xobuya, or if your Chart of accounts has already been set up in Xero, simply create new Xobuya accounts and type the appropriate existing codes from Xero to map Xobuya appropriately.
For reference, the toggle switches in the Xobuya chart of accounts (below) do not relate to Xero – these switches allow the account to be displayed in quotes.